Setting Up Post and Page Previews
This doc assumes you're storing your pages/styles/etc. in a directory called src, and you have the baseUrl option set to src in your tsconfig.json for importing modules from the root.
Faust.js supports page and post previews, allowing you to view your WordPress content on the headless frontend as drafts or even before publishing.
Set Your Headless Secret
Your headless secret is a value that authenticates requests to WordPress. This secret enables you to view content that doesn't publish on your Next.js frontend.
Copy your Headless Secret
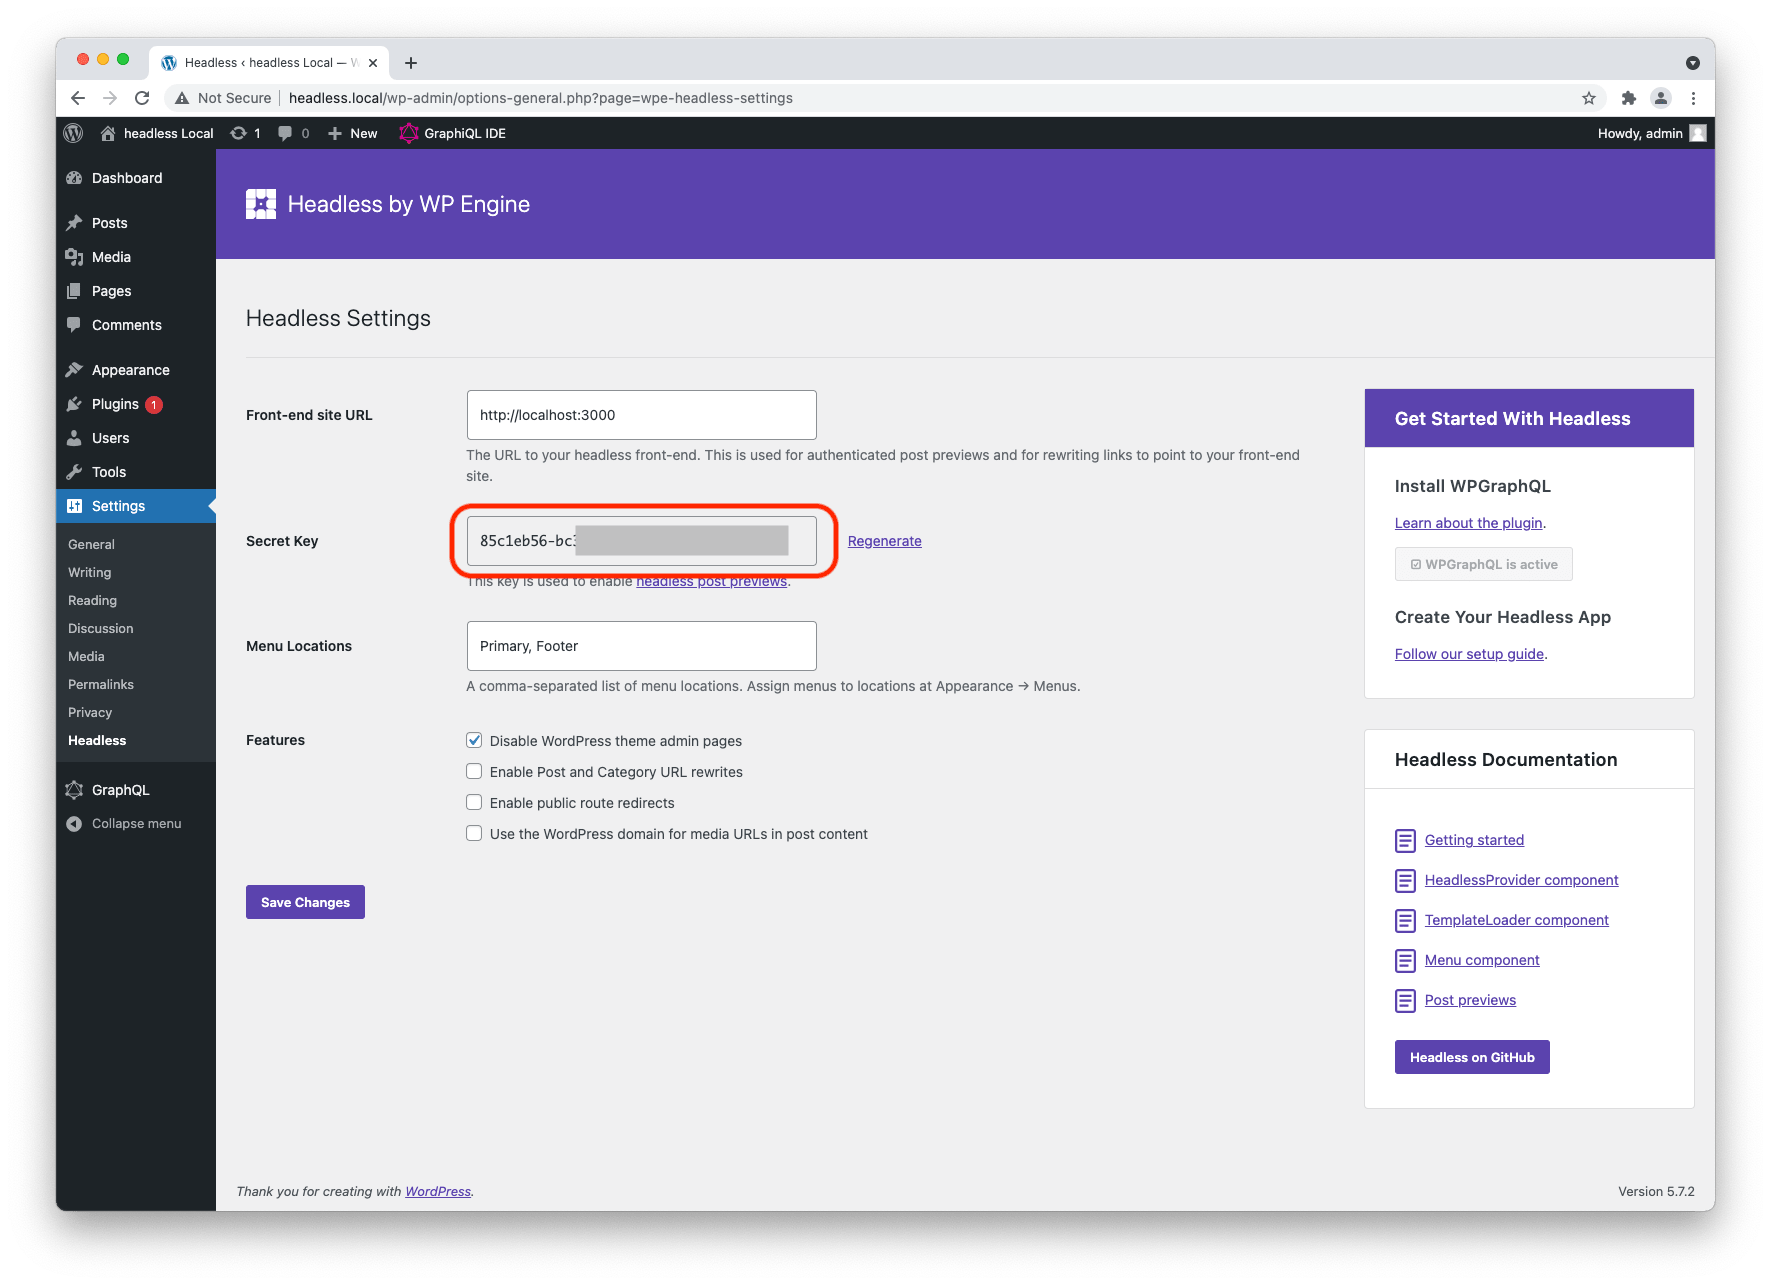
Find your Headless Secret in WP-Admin -> Settings -> Headless. Copy this value:
Add your Headless Secret to your .env.local File
Add the FAUSTWP_SECRET_KEY key to your .env.local file with the headless secret as the value. Your .env.local file should already have a value for NEXT_PUBLIC_WORDPRESS_URL. The file should look something like this:
# Your WordPress site URL
NEXT_PUBLIC_WORDPRESS_URL=http://localhost:8080

# Plugin secret found in WordPress Settings->Headless
FAUSTWP_SECRET_KEY=xxxx
Ensure you've created your faust.config.js file and are importing it in your _app.tsx
Like the next/getting-started Faust.js example, your faust.config.js file will live in the src directory.
You'll need to import it at the top of your _app.tsx file to ensure the config is set, and your Faust.js app initializes appropriately.
import 'faust.config';
import { FaustProvider } from '@faustjs/next';
import { client } from 'client';
import type { AppProps } from 'next/app';

export default function MyApp({ Component, pageProps }: AppProps) {
  return (
    <>
      <FaustProvider client={client} pageProps={pageProps}>
        <Component {...pageProps} />
      </FaustProvider>
    </>
  );
}
Create the Faust.js API Router
Next, you will need to create the apiRouter. This sets up the Faust.js API endpoints needed to authenticate requests from WordPress. Create a page at /src/pages/api/faust/[[...route]].ts with the following:
import 'faust.config';
import { apiRouter } from '@faustjs/core/api';

export default apiRouter;
Create your Preview Page
With your headless secret set and the authorizeHandler ready to handle requests, you can now create a Next.js page for previews. Create a file at /src/pages/preview.tsx with the following:
NOTE: The
usePreviewNodewas introduced inv0.15.1and replaces theusePreviewhook. From now on you should be using this hook for showing preview content.
import { PageComponent } from 'pages/[...pageUri]';
import { PostComponent } from 'pages/posts/[postSlug]';
import type { Page, Post } from 'client';
import { client } from 'client';

export default function Preview() {
  const { typeName, node } = client.auth.usePreviewNode();

  if (client.useIsLoading() || node === undefined) {
    return <p>loading...</p>;
  }

  if (node === null) {
    return <p>Post not found</p>;
  }

  switch (typeName) {
    case 'Page': {
      return <PageComponent page={node as Page} />
    }
    case 'Post': {
      return <PostComponent post={node as Post} />
    }
    // Add custom post types here as needed
    default: {
      throw new Error(`Unknown post type: ${typeName}`);
    }
  }
}
Let's break down what is going on here:
First, we are getting the usePreviewNode hook from the auth property of the client and we extract the typeName and node properties.
const { typeName, node } = client.auth.usePreviewNode();
The typeName specifies the type of the node content (Page, Post or any Custom Post Type).
The node on the other hand represents the actual data for that particular node content.
Since Typescript cannot infer the type correctly (since it thinks that it's still a Node type), we need to cast it to the correct type before we pass it on as a property to the component.
From there, we can make a determination if the result is a page or post, and render the appropriate component:
switch (typeName) {
  case 'Page': {
    return <PageComponent page={node as Page} />;
  }
  case 'Post': {
    return <PostComponent post={node as Post} />;
  }
  // Add custom post types here as needed
  default: {
    throw new Error(`Unknown post type: ${typeName}`);
  }
}
We abstract the page and post layouts into components to be reusable so there is no divergence between preview pages/posts and actual pages/posts.
Navigating to Preview Pages
Start by logging into your WordPress Admin. For this example, we'll create a new post.
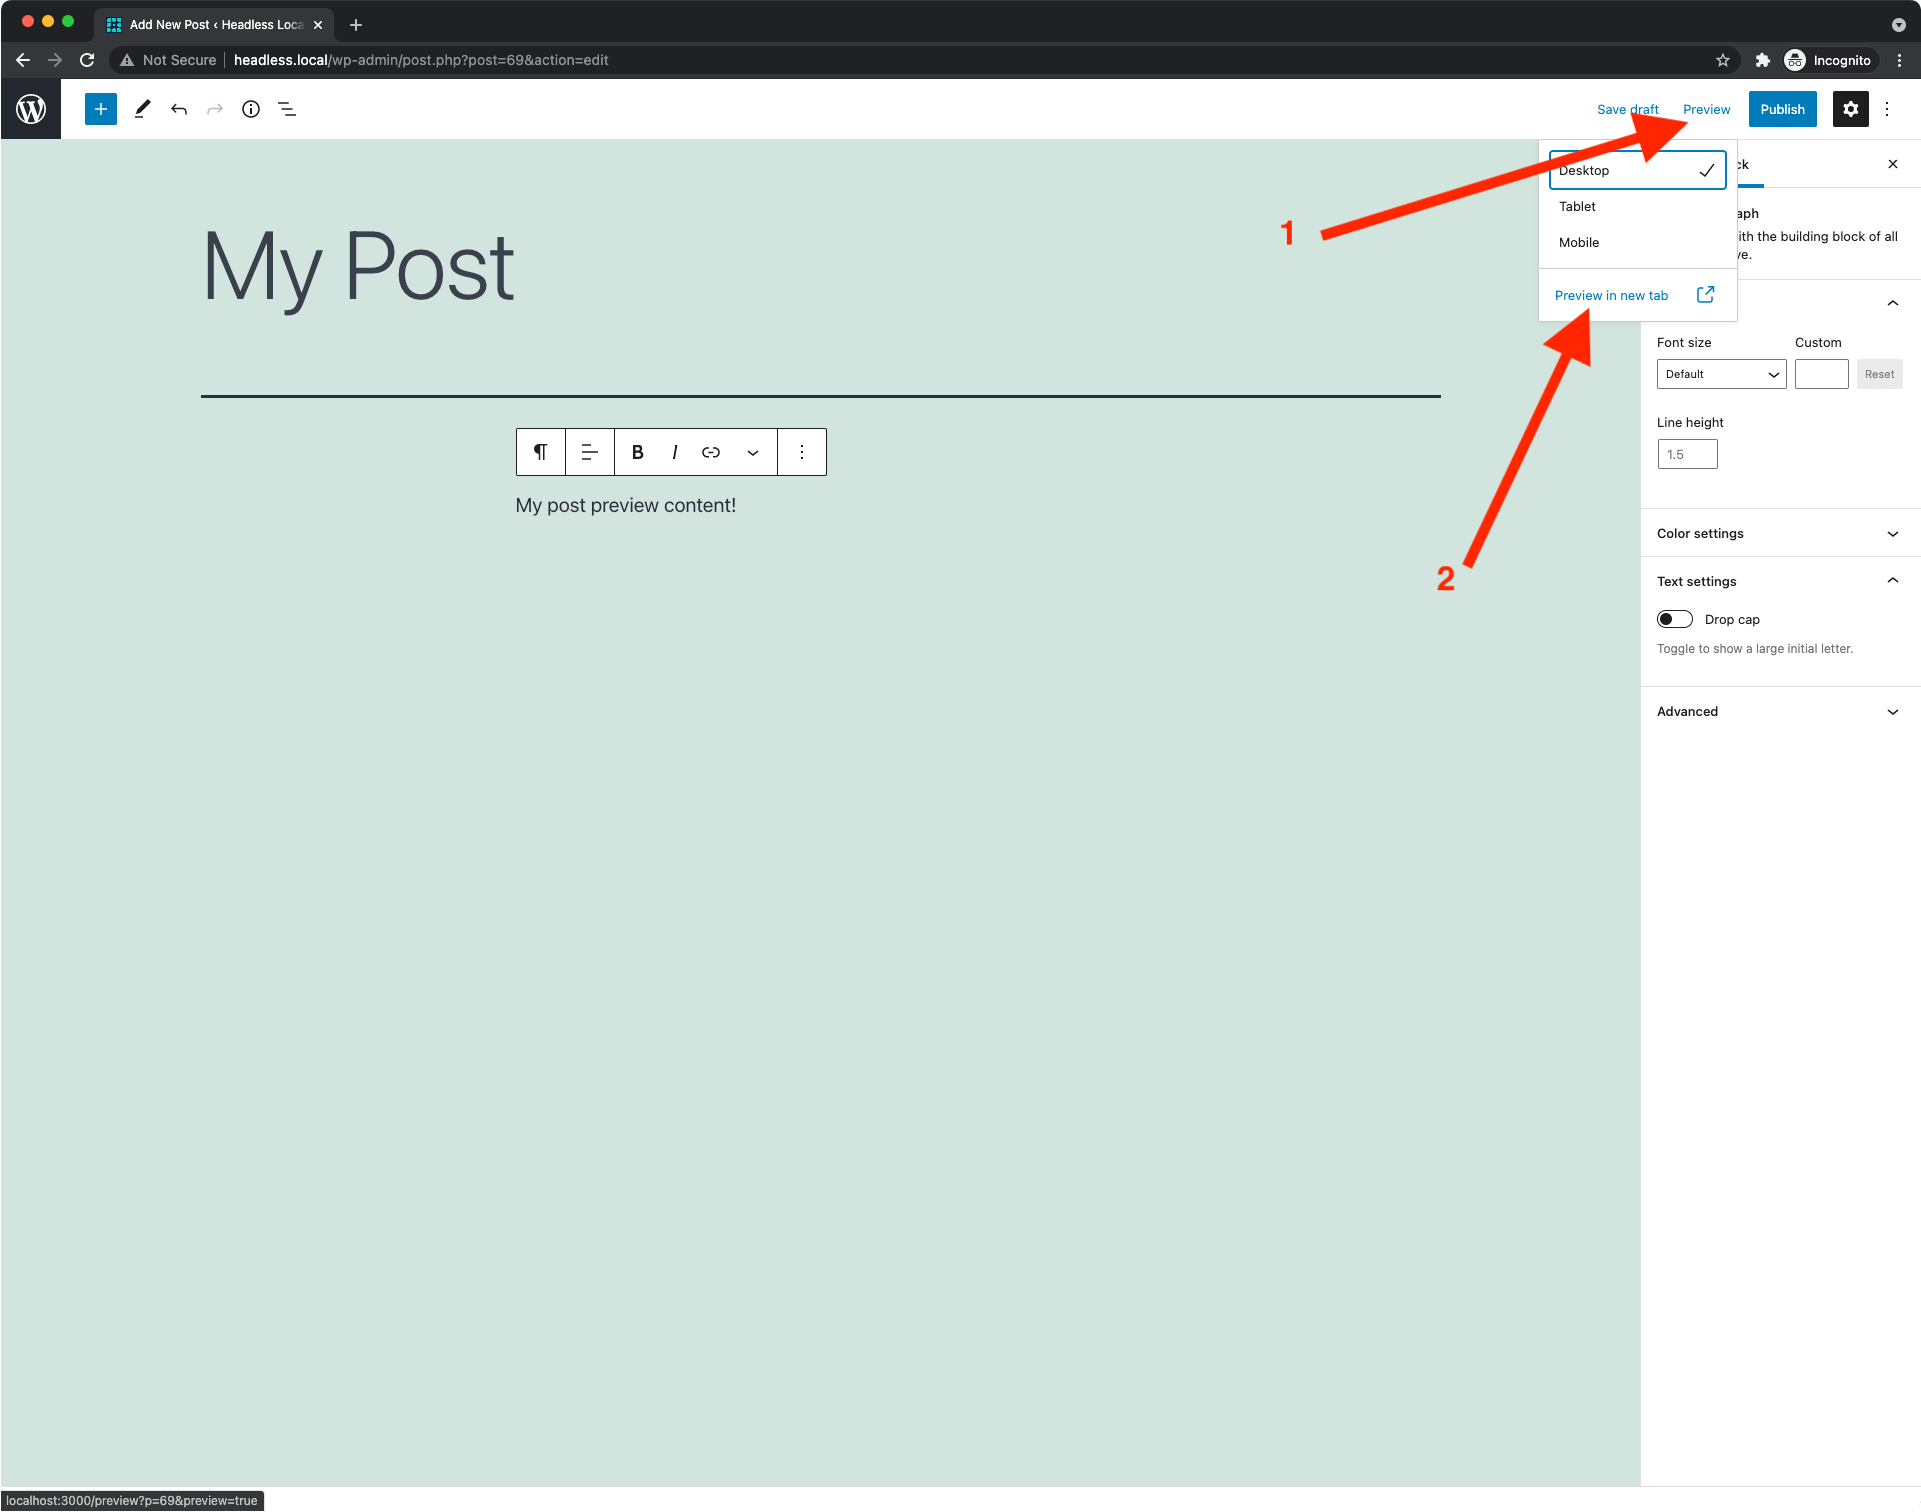
So far, I've added a title and a simple line of text for the content. To view this post as a preview on your front end, click the Preview link (1). From there, click, Preview in new tab (2):
Notice the Publish button is also visible, meaning that you still need to publish the post. Therefore you can now view the post on the frontend without being authenticated.
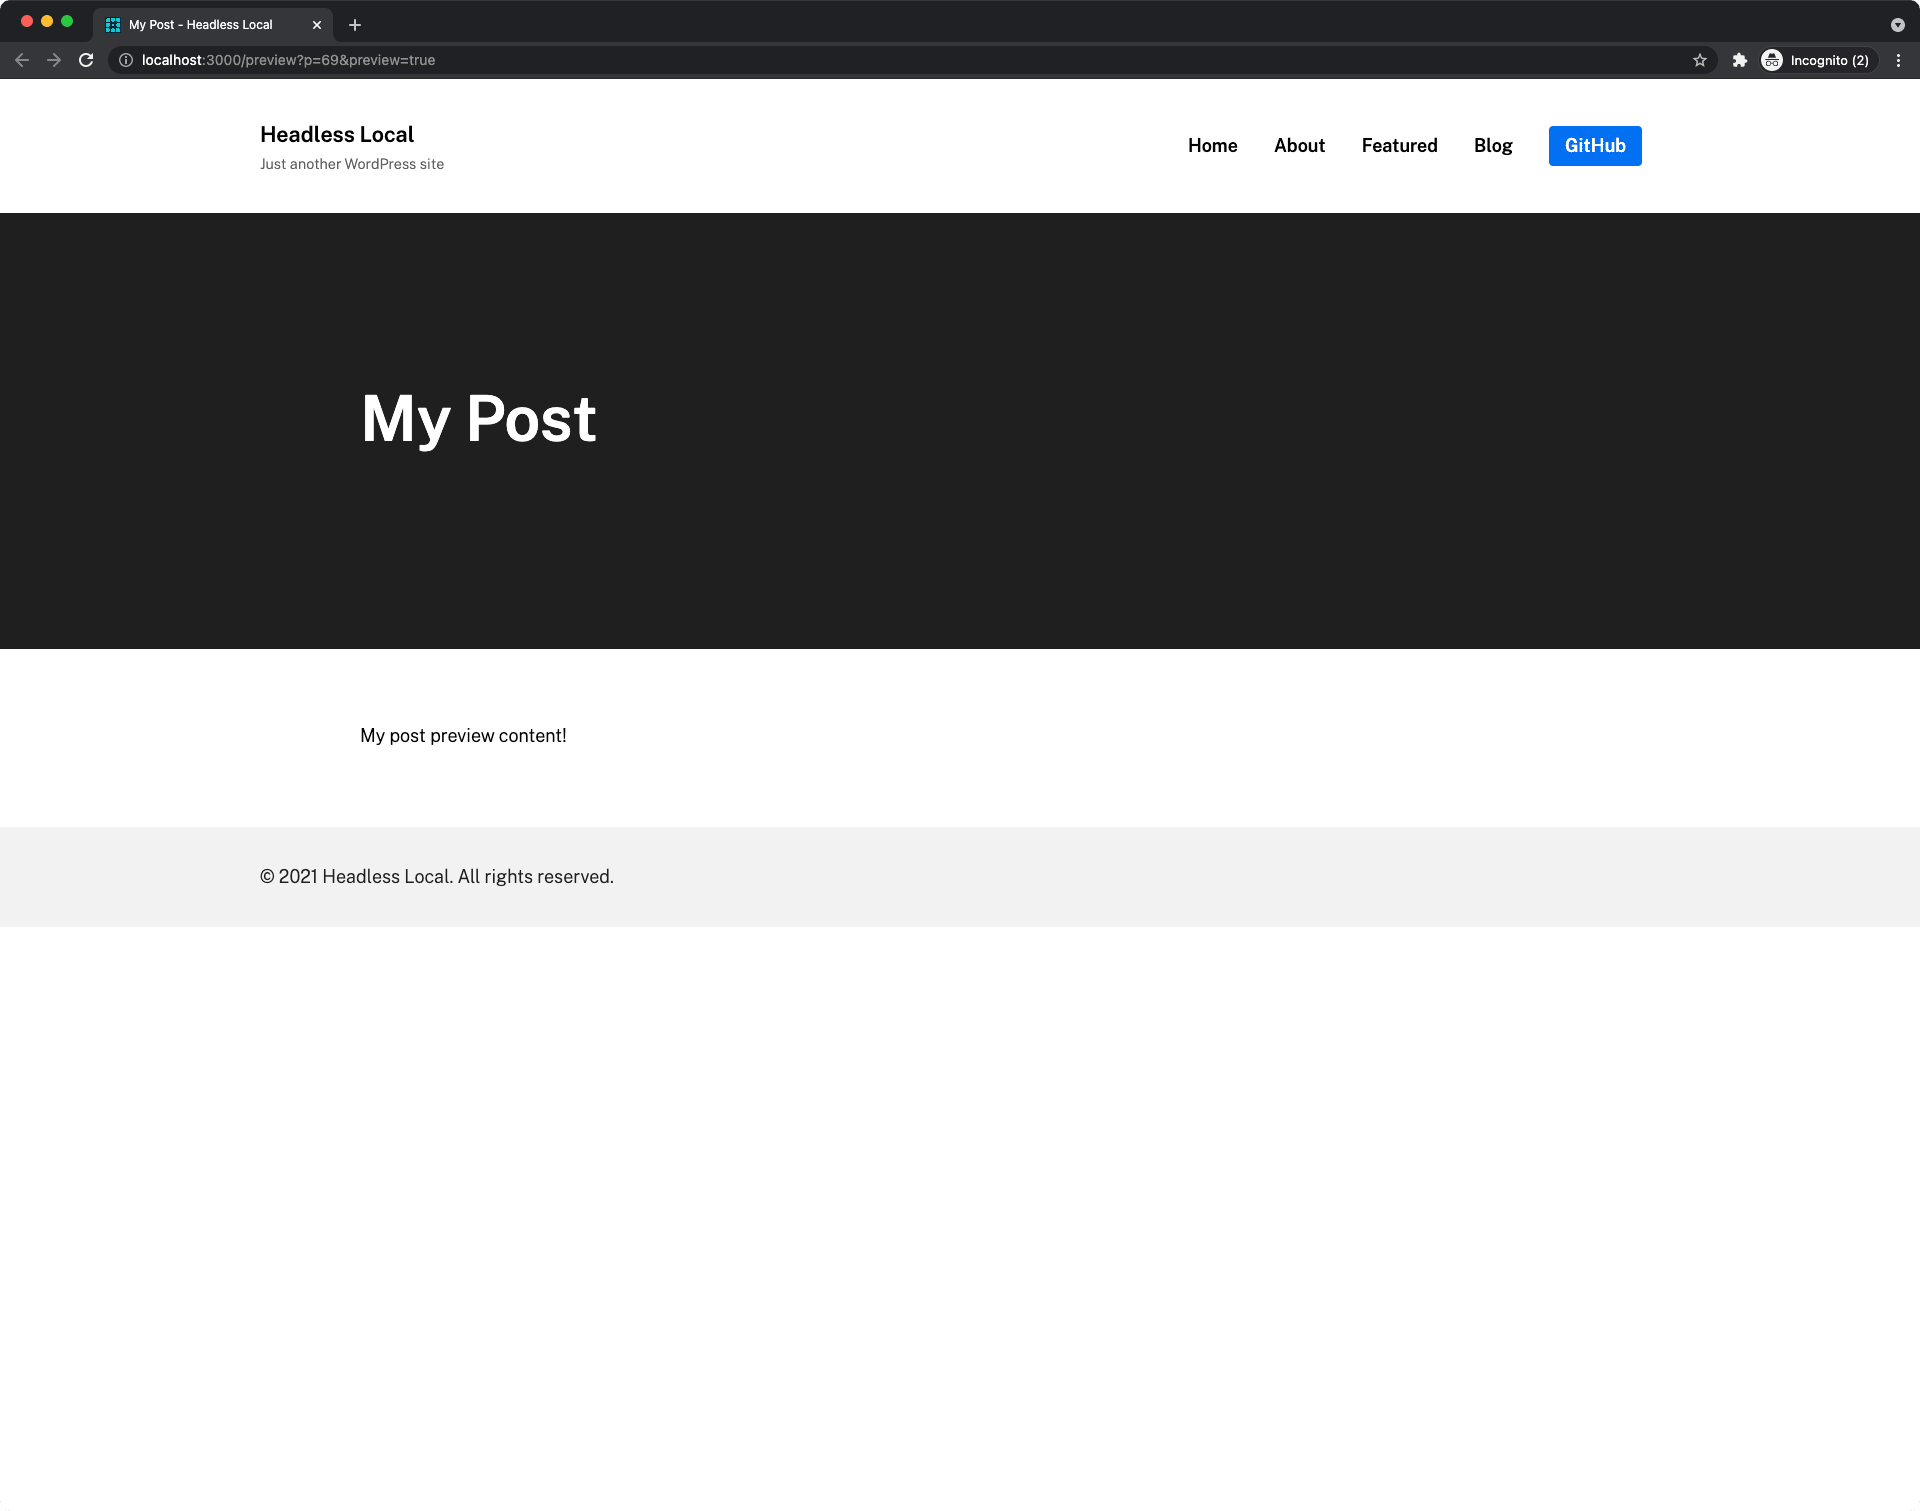
Clicking on Preview in new tab should take you to your post preview page with the current preview content:
NOTE: If you are having problems viewing Custom Post Type (CPT) previews using the above example, you need to make sure you have installed the latest version of the WPGraphQL plugin (> v1.6.11). It especially contains a bug fix when the draft previews query returns null for CPTs without revisions.